Tutorial: Creating a simple application
In this tutorial, you will use the CDT to create a simple 'Hello World' application. This tutorial describes the process of creating a new C++ project where the build is automatically managed by the CDT, and running the program.
NOTE: In earlier versions of the CDT, there were two separate project types: Managed make (automatically generated a makefile) and Standard make (required the user's makefile to build). Now with CDT, you just select a project type, and that determines what build system to use.
To create a simple "Hello World" application using CDT, perform the following general steps:
Step 1: Creating a project
- Select File > New > Project.
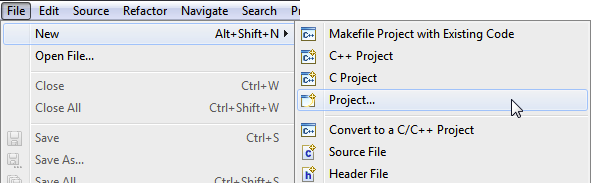
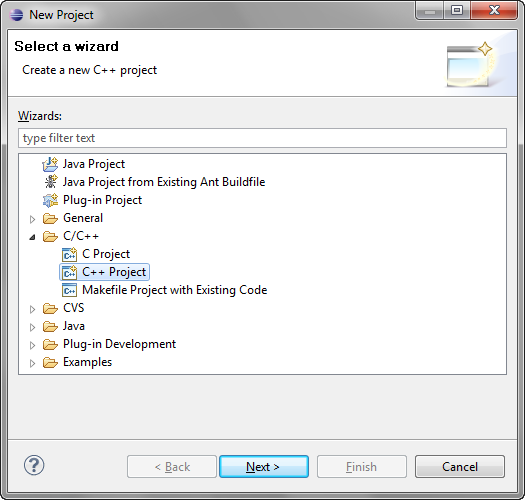
- Select the type of project to create. For this tutorial, expand the C++ folder and select C++ Project and click Next.
-
The C++ Project wizard opens.
By default, the CDT filters the Toolchain and Project types that it displays in those lists based on the language support for the C++ Project wizard you selected for this tutorial.
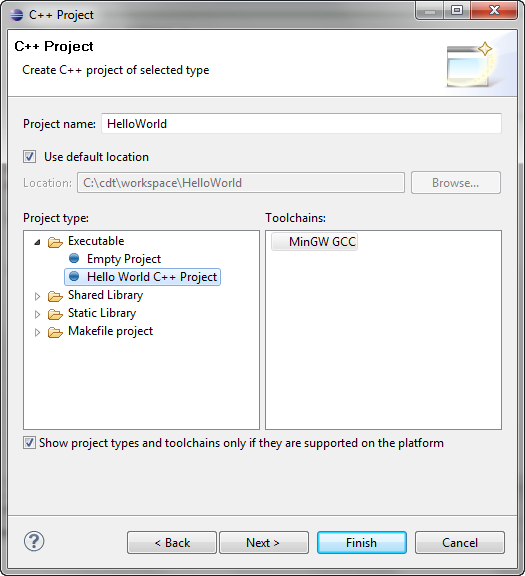
- In the Project name field, type a name for the project, such as HelloWorld.
- From the Project type list, expand Executable and select Hello World C++ Project. This project type provides a simple Hello World application in C++, and the makefile is automatically created by the CDT.
- Select a required toolchain from the Toolchain list.
A toolchain is a set of tools (such as a compiler, linker, and assembler) intended to build your project. Additional tools, such as a debugger, can be associated with a toolchain. There can be several toolchains available, depending on the compilers installed on your system.
- Click Next.
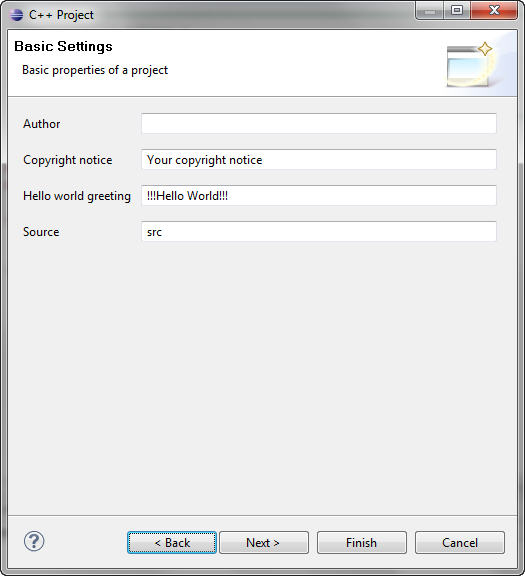
- In the Project name field, type a name for the project, such as HelloWorld.
- Specify the Basic Properties for the new project, such as your author, copyright, and source information, then click Next.
-
The Select Configurations page displays a list of configurations based on the project type and toolchain(s) selected earlier.
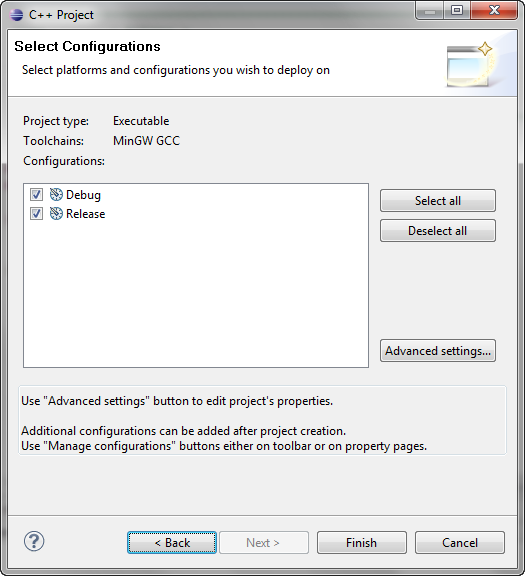
OPTIONAL: If you want to change the default project settings, click Advanced Setting to open the Project Properties dialog for your new project allowing you change any of the project specific settings, such as includes paths, compiler options, and libraries.
Click Finish.
NOTE If the C++ perspective is not currently set as the default, you are prompted to determine if you would like to this project to be associated with the C/C++ perspective. Click Yes.
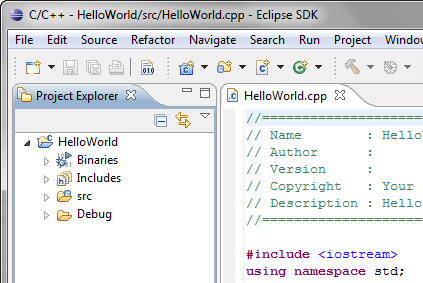
A project is created with the default settings and a full set of configurations based on the project type and toolchain you selected. You should now see the new project in Project Explorer view.
Step 2: Reviewing the code and building the project
- From the Project Explorer view, double-click the .cpp file created for your project, for example, HelloWorld.cpp. You'll find it within the project "src" folder.
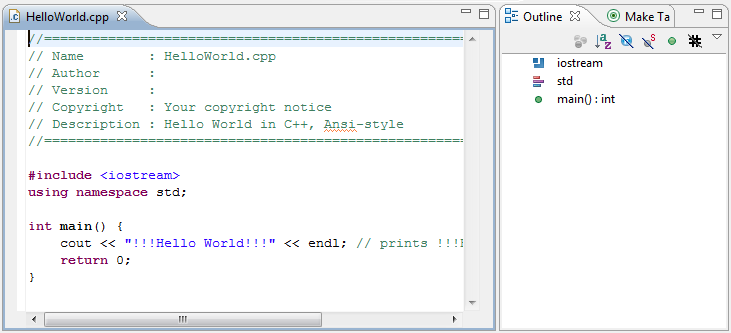
This file opens in a default editor. It contains C++ template code for the Hello World example project you selected earlier. In addition, the Outline view has also been populated with objects created from your code.
NOTE: You can specify a different editor, and add or modify existing code templates in Window > Preferences.
OPTIONAL: You can type additional code in this file, and then save the changes by clicking File > Save, or pressing CTRL+S.
Next, you will need to build your project before you can run it.
- Build your project by pressing CTRL+B, or select the project in the Project Explorer view and select Project > Build Project.
NOTE: If a build generates any errors or warnings, you can see those in the Problems view. If you encounter difficulty, see the topics Building C/C++ projects and Before you begin
. - Read through the build messages in the Console view.
The project should build successfully.
You will also see the Outline view has also been populated with objects created from your code. If you select an item from the Outline view, the corresponding text in the editor is highlighted.
Step 3: Running the application
To run your application:
- Within the C/C++ Perspective, click Run > Run Configurations....
- Select C/C++ Application.
- Click New.
A new Run Configuration is created. Its name and path to the executable are provided by the project ('Hello World' in our case).
- Click Run.
Now, you should see the Hello World application running in the Console view. The Console also shows which application is running in a title bar.
- You can click the other views to see the information that they contain.
